
So, you have a bunch of “404 not found” errors on your website? It’s good SEO practice to fix them but doing it manually can be a major pain.
In this post I will show you an easy way to redirect your 404s to relevant existing pages in an automated way.
Why you should care about 404s
There are a couple of reasons why it’s a good idea to fix broken links.
- User experience – no one likes to land on non-existent pages. More often than not your visitors will navigate back to the search engine if they see a 404 page instead of the content they were looking for. If your site contains relevant content under a different URL – it’s worth redirecting the visitor to that URL.
- Link juice – if an external link points to non-existent page on your site you will lose the SEO benefit it could provide.
301 redirects to the rescue
In order to fix the 404 errors we will create a set of 301 redirects from the broken URLs to the most relevant existing URLs on your site.
How to create 301 redirects
There are several ways to create 301 redirects.
If you have a small number of 404s you can get away with manually creating them in your .htaccess file or your CMS on a one-by-one basis or using Regular Expressions (Regexes).
For more difficult cases (larger number of 404s / irregular URL structure) you can use Excel / Google Docs with VLOOKUP formulas.
If this all sounds like too much work – there’s an easier way. You can use an automated URL mapping tool (like GetRedirects).
Why use an automated URL mapping tool?
There are a few advantages:
- It saves time by taking care of the most time-consuming part of the job, i.e. mapping the old/broken URLs to existing ones.
- It analyses the content of your pages, in addition to the URLs, providing more relevant redirects.
- It integrates content from the Internet Archive’s Wayback Machine to improve the mapping.
What you will need
- A list of your 404 errors.
The best way to get it is from the Google Search Console. You can download a list of 404s on the Crawl > Crawl Errors page there.
If you don’t have your website set up in the GSC you can also grab the list from you server logs. This option is requires a bit of filtering and formatting work so it’s easiest and best to use the Google Search Console whenever possible.
- Access to your hosting account and/or your CMS admin panel
This will be necessary to upload your redirects and make them effective on your website.
Most CMS/Ecommerce systems these days let you upload redirects directly through the admin panel. If your CMS doesn’t allow that you will need FTP access to you hosting account in order to add the redirects to your .htaccess file.
- Access to our GetRedirects URL mapping and redirection tool.
You can sign up for a free early access account here.
Step 1: Download your 404s from the Google Search Console
You can download this list on the Crawl > Crawl Errors page. This is a CSV file that you will upload into the mapper in the next step.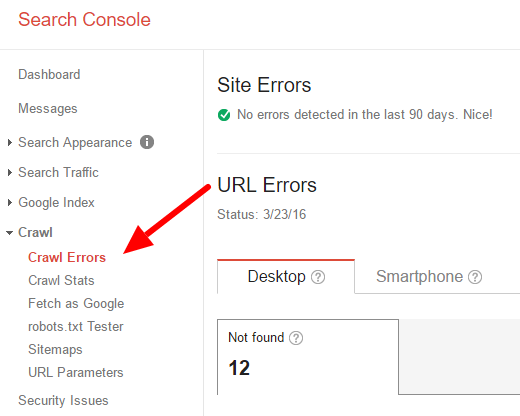
Step 2: Feed your 404s into the mapping tool
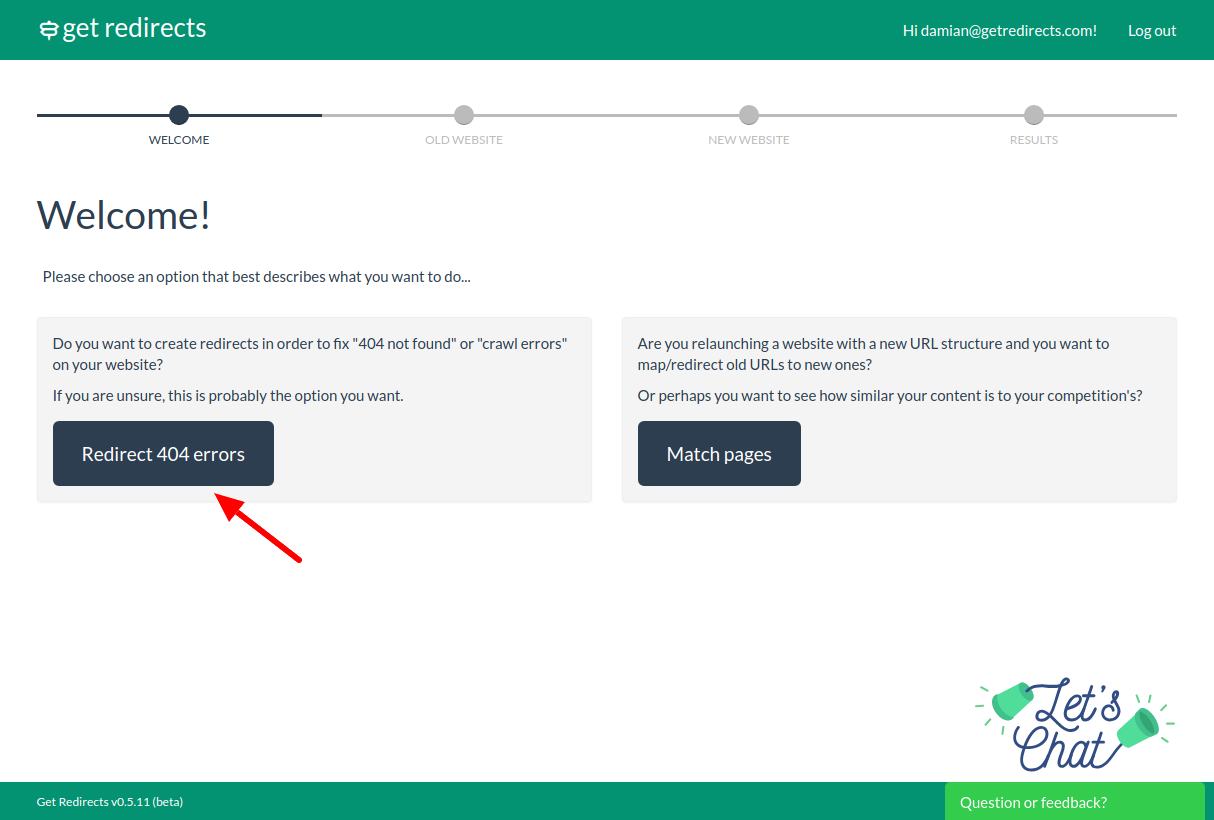
Once you log in to GetRedirects, you will be greeted with a welcome screen. Choose Redirect 404 errors.
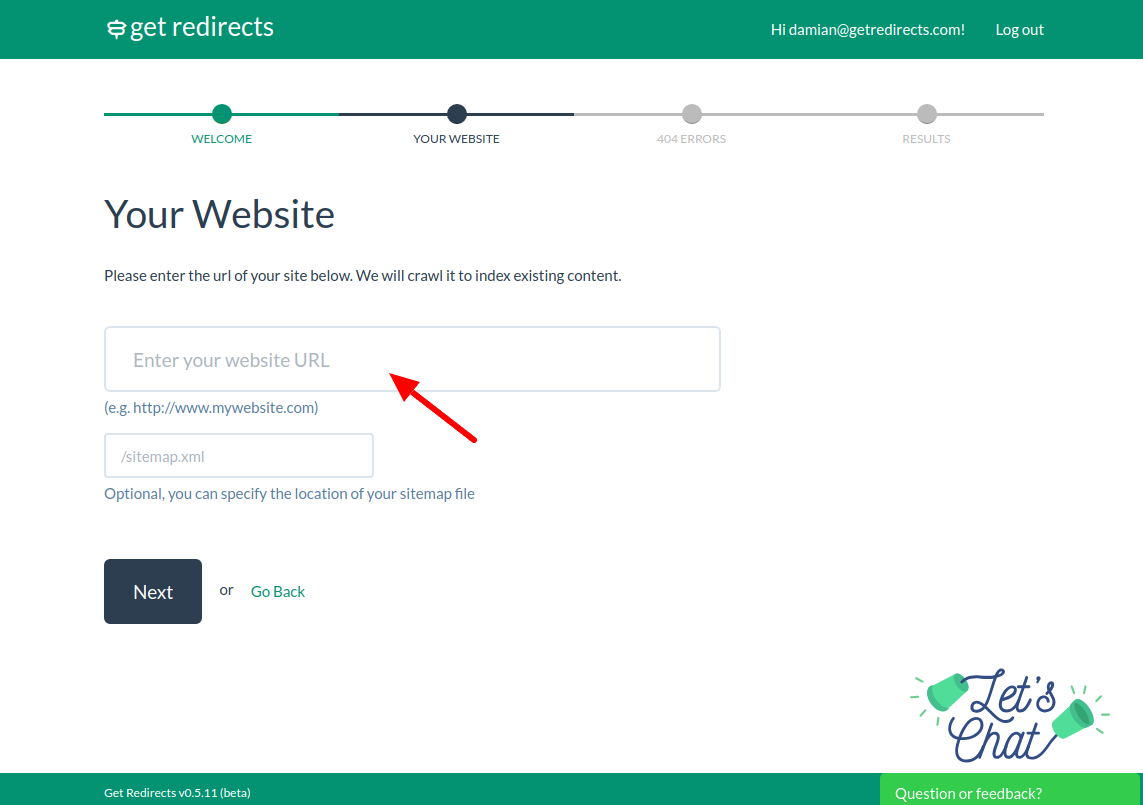
Then enter the URL of the website you want to fix 404s on and click Next. The mapper needs this in order to crawl the site.
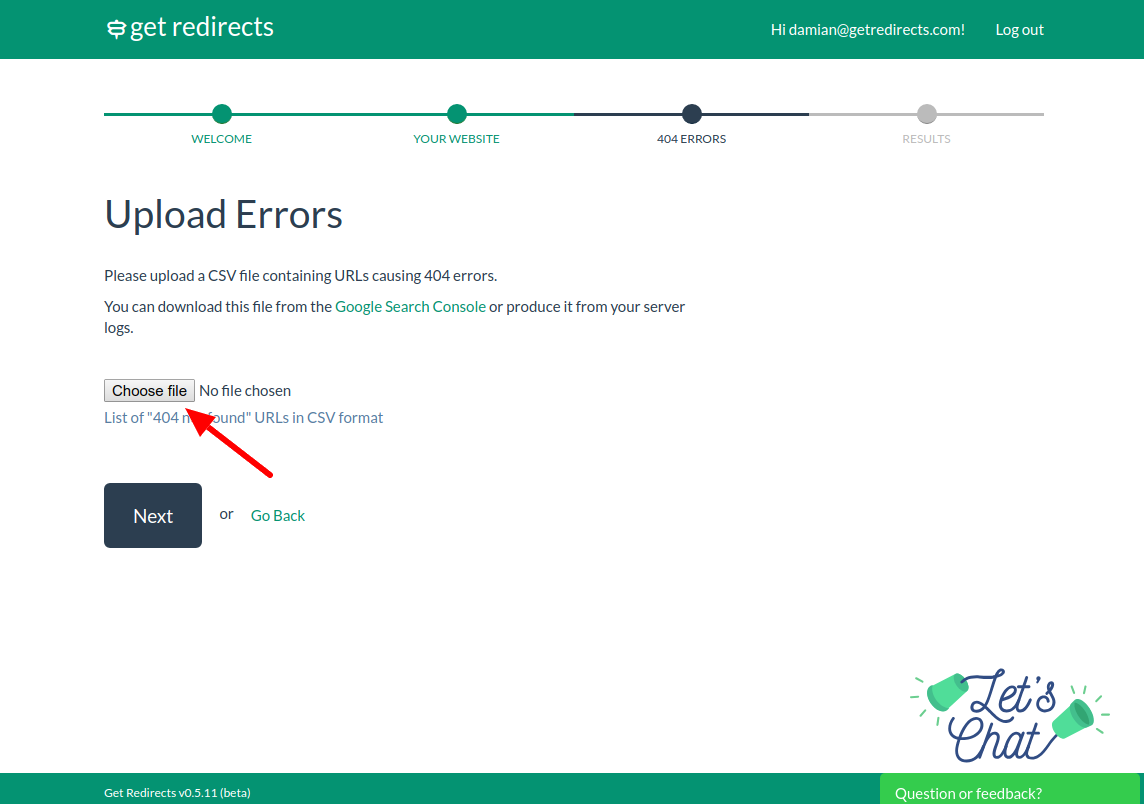
Finally, choose the CSV with your 404s that you downloaded from the Google Search Console on the Upload Errors page. Click Next.
When you click Next the automated process will begin. The tool will crawl your site and also attempt to download content from the Web Archive for the 404s you submitted.
When crawling is done the tool will match your 404s to the most similar existing pages and will present a list of redirects like this:
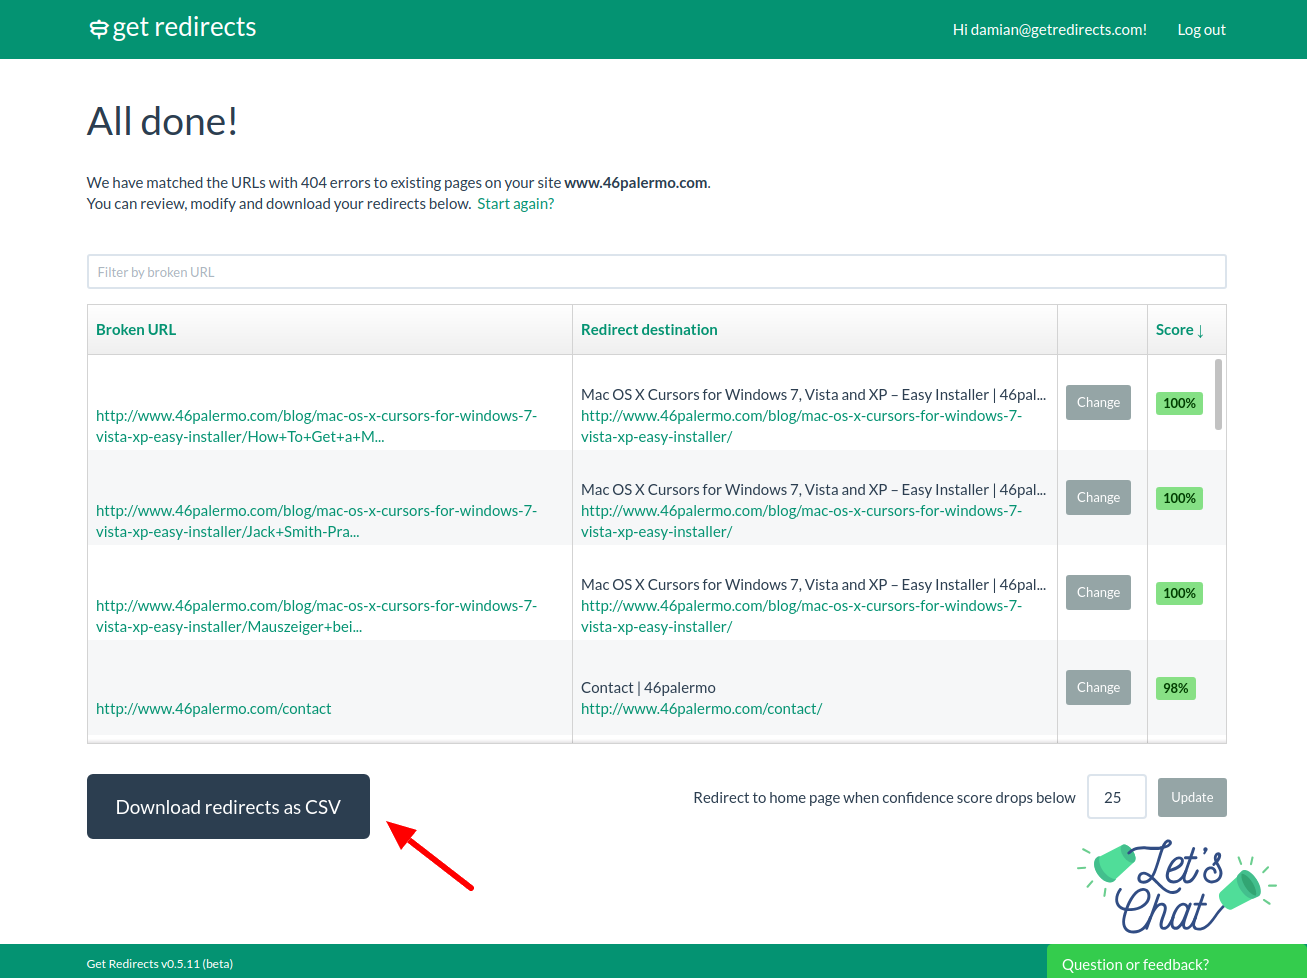
You can modify the redirects by clicking Change.
Step 3: Download your redirects
Once you are happy with the results you can download your redirects from the tool and import them into your website. There are a few formats available:
- A CSV file – if your CMS supports uploading redirects in the CSV format or you want process the redirects further (e.g. in Excel)
- Apache .htaccess (coming soon) – if your site uses an Apache server and you want to paste rewrite rules directly to you .htaccess file
- Nginx (coming soon) – similarly, if your site runs on the Nginx server, you can download a set of rewrite rules that you can paste into your Nginx config file.
That’s it! You’re done.
Would you like to try out this method? Sign up for a free GetRedirects account.